How to Virginize Benz FBS4 ISM with CG FC200
Mercedes-Benz vehicles equipped with FBS4 (the fourth generation of the drive authorization system) require specialized tools and procedures when replacing Intelligent Servo Module (ISM) or Drive Select Module (DSM) components. One such tool is the CG FCC200 ECU Programmer, which allows technicians to read, write, and transfer data between modules.
In this article, we break down a real-world case involving a Mercedes W212 with FBS4, where the original ISM/DSM needed replacement. The following guide walks you through the process — from wiring and reading data to verifying the repair and troubleshooting post-installation faults.
Understanding the Components
In this case, two modules are involved:
- Original ISM/DSM — the existing module in the vehicle.
- New (donor) ISM/DSM — the replacement module that needs to receive the original data.
Both modules are FBS4-compliant. Simply swapping them without data transfer will not work due to immobilizer and coding mismatches.
Tools Required
- CG FC200 ECU Programmer
- Appropriate wiring harness and power supply
- A computer with FC200 software installed
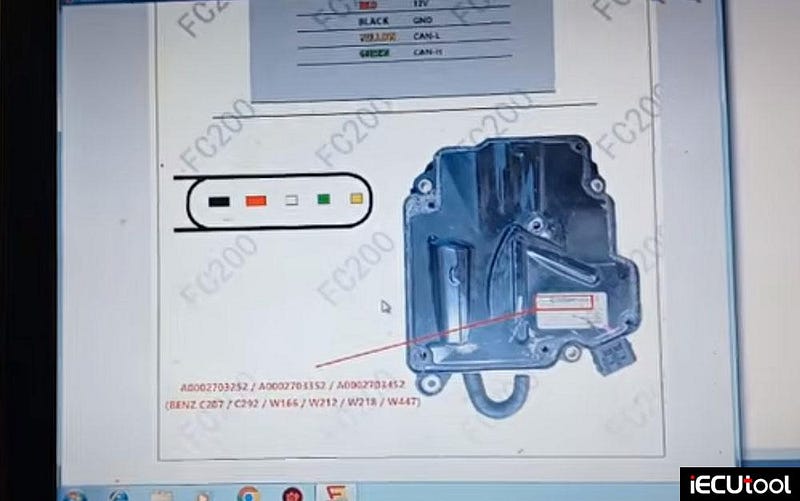
Step 1: Wiring and Initial Connection
Before starting, ensure you follow the correct wiring diagram provided in the FC200 software. The diagram will show pin assignments and connection points for the ISM/DSM modules.
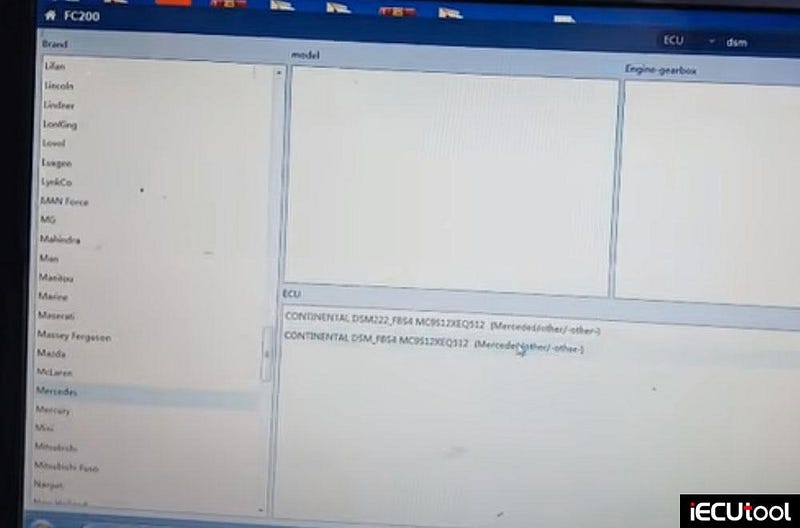
Once wired, open the FC200 software and navigate to:
Mercedes -DSM — FBS4
Select the correct platform. Then, connect the power supply — a commonly overlooked but critical step.

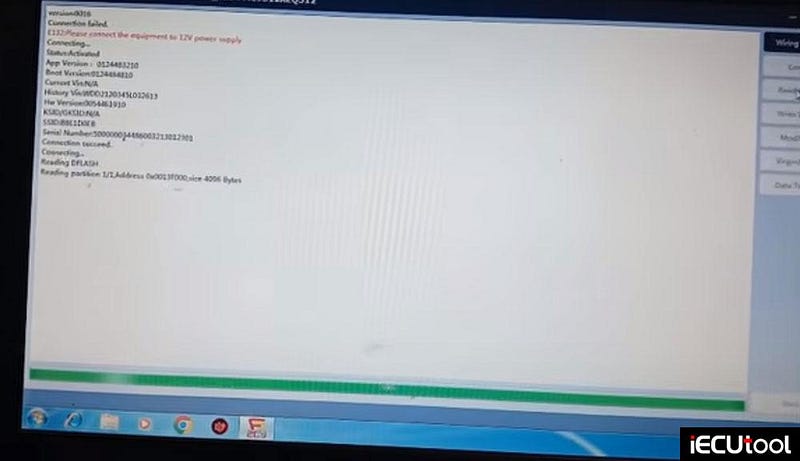
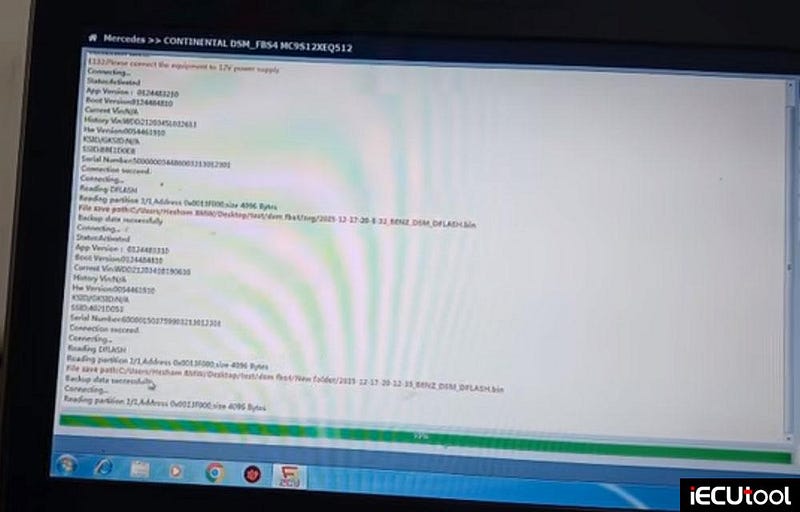
Step 2: Reading Data from the Original Module
With the original module connected:
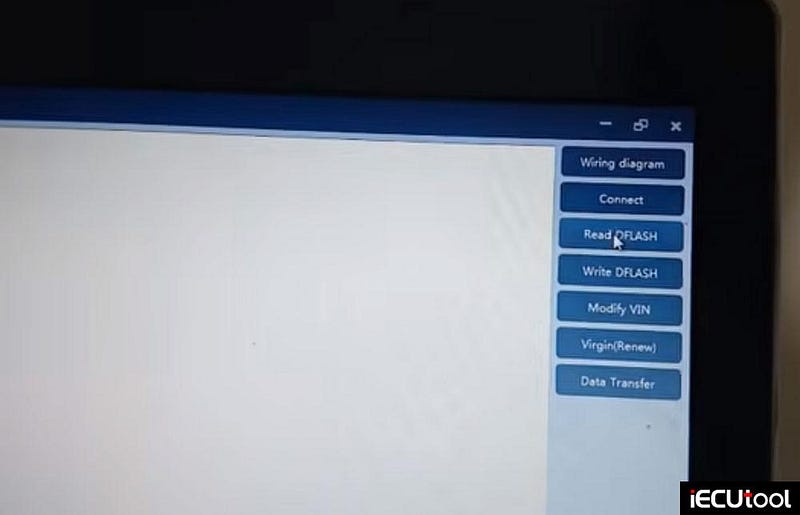
- Click Connect.
- Select Read Flash.
- Create a folder to save the backup (e.g., DSMFBS4_original).
- Save the flash data.
This backup contains the original VIN, coding, and configuration data. Do not skip this step — without it, you cannot transfer the identity to the new module.
Step 3: Connecting the New (Donor) Module
Disconnect the original module and connect the new one.
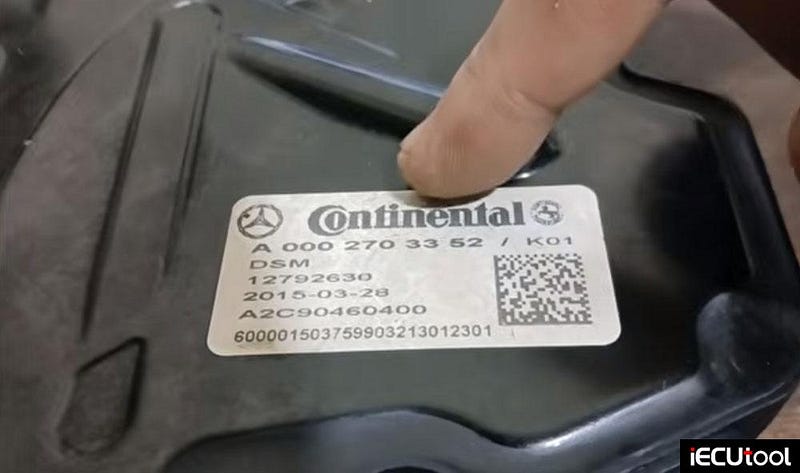
Verify the module numbers against the wiring diagram. In this case:
- Original module number ended with 252
- New module number ended with 3352
Once connected:
- Click Connect.
- Select Version to identify the new module.
- If prompted about erasing data — click No until you have backed everything up.

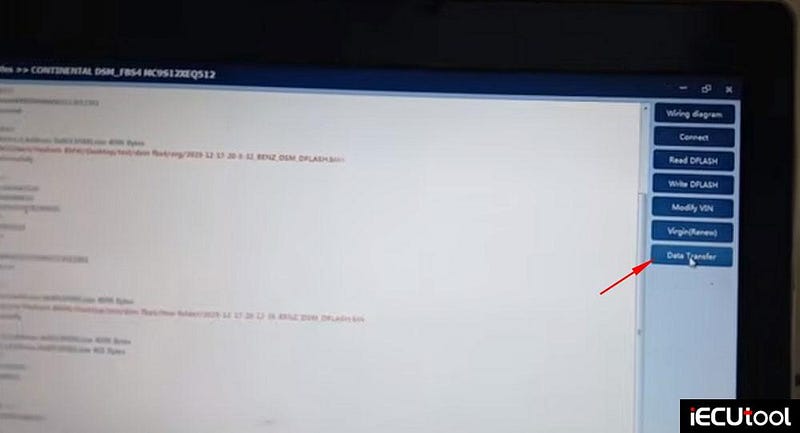
Step 4: Reading and Writing Data
Now, follow this sequence carefully:
- Read the flash from the donor (new) module — save it as a backup as well.
- Load the original D-flash (the data you saved from the original module).
- Use the Data Transfer function in CG FC200.
- The software will write the original data to the new module.
After writing, you should see a confirmation: write data successfully.
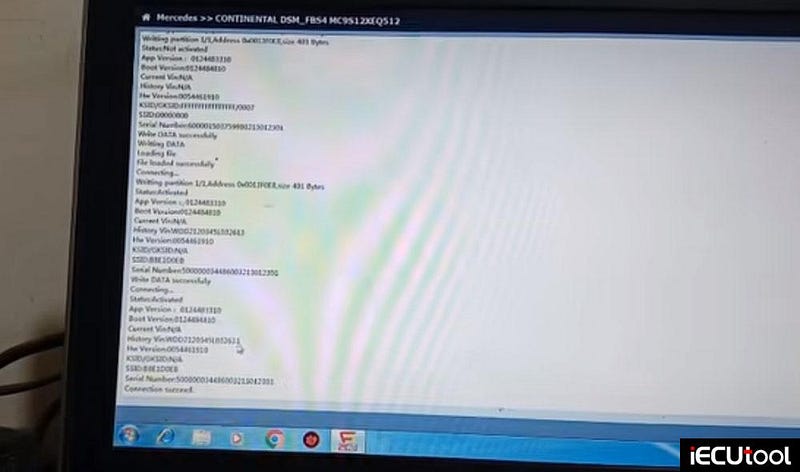
Step 5: Verification
To confirm the transfer worked:
- Go back to the main menu and select Connect.
- Read the VIN from the new module.
- Verify that it matches the original vehicle’s VIN (e.g., ending in 13 in this case).
If the VIN matches, the data transfer was successful.
Real-World Test and Troubleshooting
The vehicle was initially in another workshop. After installing the newly programmed ISM, the same fault code appeared. The technician requested the fault code, which turned out to be:
Communication with direct select lever has a malfunction
This pointed not to the ISM itself, but to the shifter on the steering wheel column.
The Fix:
- The steering column control module was inspected.
- Two screws were removed from the back of the module.
- Ribbon cables inside were checked for damage or poor connection.
- After cleaning and reseating the ribbon cables, the fault was resolved.
- The gear engaged perfectly, and the vehicle moved.
Key takeaway: A fault code stored in the ISM does not always mean the ISM is faulty. Always check related components — in this case, the direct select lever on the steering column.
Final Result
- The new ISM (donor module) worked flawlessly after data transfer.
- The original ISM could also be reinstalled if needed.
- The root cause was a physical issue with the steering column shifter, not the module programming.


Comments
Post a Comment