How to Clone Smart 450 BCM Using Xhorse Multi Prog
In this article, we will explore the process of cloning a Smart 450 Body Control Module (BCM) using the Xhorse Multi Prog tool. The goal is to read and transfer data from the original BCM to a replacement unit, ensuring seamless functionality.
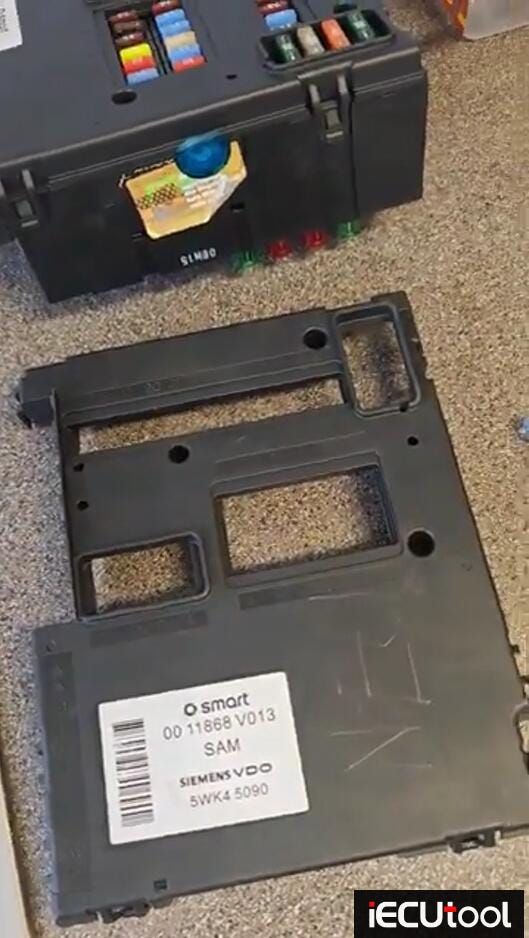
Step 1: Preparing the BCM
The first step involves connecting the Multi prog tool to the BCM:
Pinout Identification — The BCM uses a 4-wire connection (power, ground, and two data lines).
Smart 450 BCM pinout (for multi prog, vvdi prog and x-prog etc). VVDI Prog can also clone smart 450 bcm.

Tool Connection — The Multiprog is attached to the BCM, ensuring proper contact with the pins.


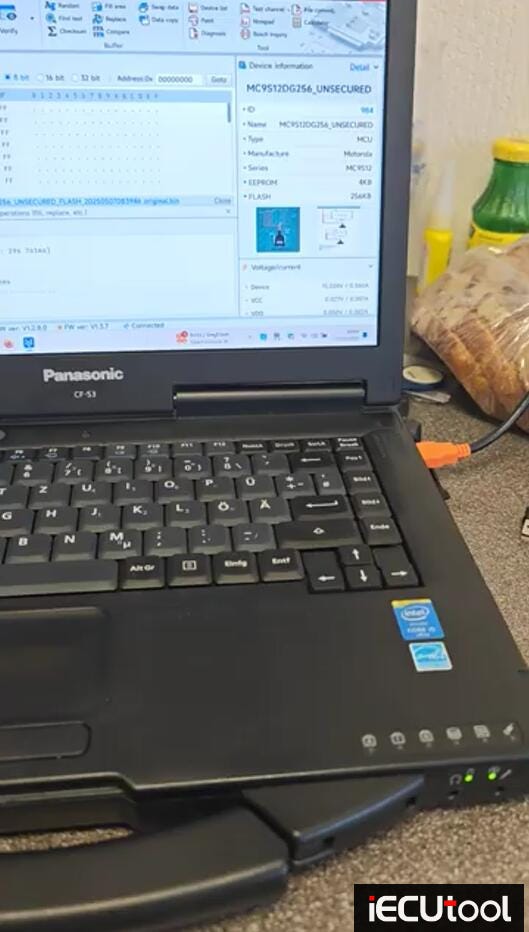
Step 2: Reading the Original BCM Data
Read the data from the original BCM:
- Reading EEPROM and Flash — The tool extracts data from both the EEPROM and Flash memory of the BCM.
- Verification — The Multiprog automatically performs a verification check to ensure the data is read correctly.
Key Observations:
- The BCM contains a Motorola 912 256 chip, which is unsecured (not encrypted), making the cloning process straightforward.
- The Chip ID (processor identifier) is visible, confirming compatibility.
Step 3: Writing Data to the New BCM
After successfully reading the original data, the next step is transferring it to the replacement BCM:
- Writing EEPROM and Flash — The same data is written to the new BCM.
- Automatic Verification — The tool cross-checks the written data to ensure accuracy.


Step 4: Testing and Final Steps
Once the cloning is complete:
- The replacement BCM should function identically to the original.
This process is efficient, taking only a few minutes, and works well due to the unsecured Motorola chip. For those attempting this, referencing online pinout diagrams is essential for a smooth workflow.


Comments
Post a Comment